| Home | Models | News | Members | Parts | Rovernet | Links | For Sale | |
 Glen's
Wichita 3500 Glen's
Wichita 3500 |
||||||||
 |
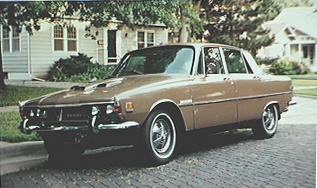
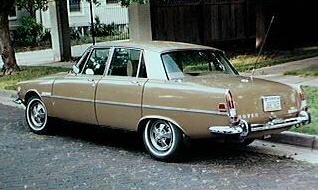
The car next went to a real Rover fan in Wichita who had two Range Rovers, at least four older Land Rovers, two 2000TC P6 Rover sedans, and a second 3500S. He had several more Rover vehicles in storage in a parking garage in the city. The car has just over 83,000 miles on the odometer, and there is virtually no rust anywhere on the car as a result of having spent most of its life in New Mexico. The downside of being from New Mexico is that the paint had been damaged by the sun and buffed out repeatedly and there are some perished rubber seals.
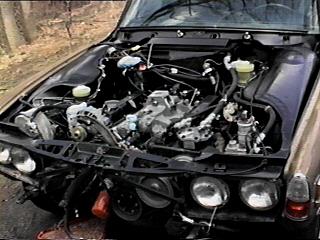
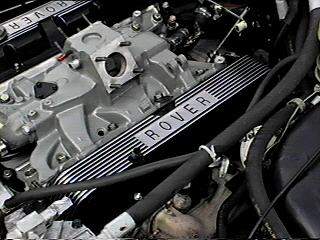
The pictures below show the work I've been doing in the engine compartment. I spent days cleaning and degreasing the engine compartment and then painted most of the areas which had originally been black with POR-15 Chassis Paint which left a tough semi-gloss finish. I intend to topcoat the easily accessible underhood areas with a nice satin black after the car has been repainted just to make it look nice and to cover up any overspray from the painting process. I removed the radiators and had them hot tanked and repaired as necessary. The radiator fan was replaced because it was missing one blade. Things are very tight in front of the engine.
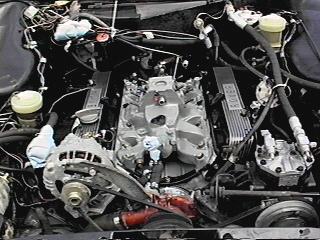
I pulled the intake manifold, cleaned it and repainted it because the rubber seals at each end of the manifold gasket were leaking slightly and because I wanted to inspect the camshaft and hydraulic lifters. The camshaft and lifters showed very little sign of wear. In fact, they looked brand new. At this point, I hunted down the Denver owner who told me that the Santa Fe owner had claimed that the engine was rebuilt at just past the 50,000 mile mark. This seems likely to have been true based on the indications I have found.
The original light gray paint on the valve covers was in bad shape, and I decided to strip the paint down to the cast aluminum and repaint them. The black color is not original, but I'm very pleased with the appearance. I lightly sanded the aluminum and painted the covers with the Eastwood Company's satin black epoxy paint. Once the paint had fully cured, I sanded all of the high areas of the castings working down to a 725-grit paper which left a very smooth surface. Finally, I coated the valve covers with a clear acrylic, which should keep the polished aluminum from oxidizing. I really love my valve covers.
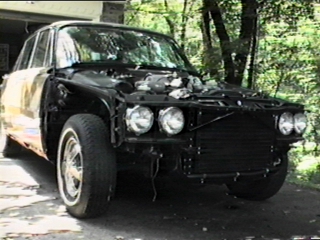
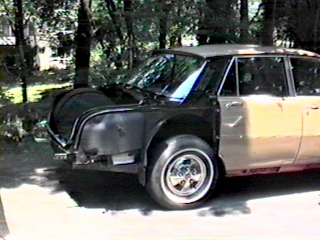
This view shows the front of the car with just about everything removed. Missing are the front valance, both front fenders, the front deck below the windshield, the hood and the front bumper. The engine bay and front area (except for the radiator) were painted with POR15 semi-gloss anti-rust paint.
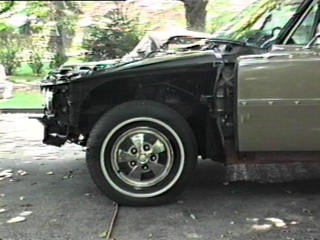
Here's a view of the front suspension. The service manual recommends removing the fender to work in this area, and you couldn't get better advice. The fender comes off very easily after removing four bolts and separating a few wiring connections. When the wheel and tire come off, you have all the room in the world. Here you can see the horizontal front spring and the knee arm that rotates in the bushings against the firewall as the wheel moves up and down.
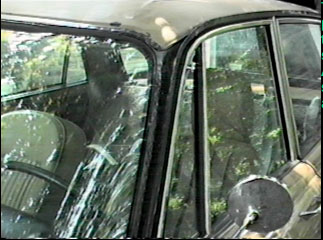
This view shows the A-pillar area with the stainless trim pieces removed. (The windshield rubber has been cut back to expose the metal for clean-up and painting.) There was some surface rust under the stainless rain gutter trim. The A-pillar trim covers a drainage channel which traps leaves, sticks and dirt which block the channel and cause rust by absorbing and retaining water.
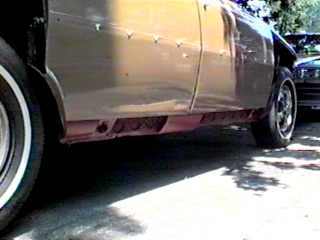
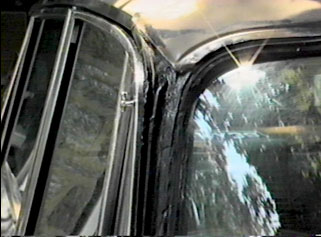
There's an additional complication on the passenger side. Would you believe that little plastic pipe runs all the way back to the gas tank? Even more stuff gets stuck around that pipe. You'll find it again if you remove the interior trim above and behind the rear door. Here's a view of the rear quarter. This was also in great shape on my car. I sprayed a new layer of undercoating over what was there after removing a few loose pieces. That valance above and behind the rear door has three little flaps that function as the flow-through ventilation system on this particular car. You can watch the flaps blow outward as air exits when you shut the door. I painted the valance area with POR15 as well even though there was no real rust here.
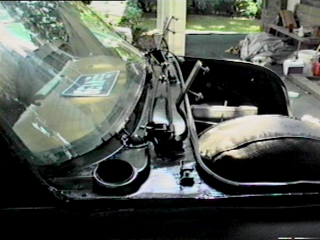
This view shows the back of the car with the rear deck removed. This area traps a lot of leaves and dirt. I cleaned the area and chipped away some deteriorated body sealer where some rust was starting. Again, I painted with POR15 semi-gloss. You can see the hinges for the boot lid. The metal loops running toward the center of the deck are springs that act as a counterpoise for the boot lid. The rear deck is a pain to remove because of the fuel filler neck. The manual says to cut the hose connecting it to the gas tank, but I managed to get it apart without destroying anything. Questions or problems regarding this web site should be directed
to Stephen Beer |
|||||||